Building your own prefabricated home in Quebec is an attainable dream… provided you plan each step carefully. Between financing, land purchase, permits, site preparation, and assembly, it's easy to overlook important details that can derail your budget or schedule.
In this guide, we present to you the 16 essential steps to make your self-build a success, from the first call to the bank to the exterior finishing touches.
⚠️ Important notice
This guide is for informational purposes only. Costs, standards, and regulations vary by region and project. Always consult qualified professionals and the appropriate authorities when making your decisions. Collection Immobilière assumes no responsibility for the use of this information.
1. Mortgage pre-authorization (financing)

The first step is to obtain a mortgage pre-approval from your financial institution. This process certifies your borrowing capacity based on your income, debts, down payment, and the project you're considering. This is a good practice that allows you to know exactly how much you can afford to spend on your home before buying land or signing a contract.
This way, you'll avoid finding yourself stuck with a plot of land without the financial means to build the house you want. It's strongly recommended that you have a pre-approval letter in hand before taking any further steps. You can do this directly with your bank or with the help of a mortgage broker.
Moreover, some mortgage brokers are fully aware of the realities of financing manufactured home projects, which can greatly facilitate your efforts. This is the case with our partner Apoint Mortgages, whose expertise helps you quickly obtain the best conditions adapted to your budget and your project.
👉 Make an appointment with an Apoint broker
Sources:
2. Purchase of land

Once you've set your budget, the second step is purchasing the land. In Quebec, prices vary greatly depending on size, location, and available services: expect to pay around 30,000 $ for a remote rural lot and over 200,000 $ for a well-located lot in a desirable suburb.
Before buying, always check zoning and municipal regulations to confirm that you can build the house you want. A serviced lot (connected to water and sewer) is easier to develop because it already has these connections. Although more expensive, it saves you from having to install the infrastructure yourself.
Conversely, an unserviced site requires:
-
An artesian well (approximately 10,000 $, depending on depth and soil) for drinking water.
-
A septic tank with a leaching field (approximately 25,000 $ in 2021), the type of which will depend on a mandatory soil study.
The presence or absence of municipal services therefore strongly influences the budget and the work to be planned. Also consider checking access to electricity (Hydro-Québec network), internet, and telecommunications, especially in rural areas.
| Type of land | Necessary work | Indicative cost | Notes |
|---|---|---|---|
| Served (municipal water and sewers) | Connection to the water and sewer system | Included in municipal connection fees (a few hundred to a few thousand $) | Simpler and faster to develop |
| Not served | Artesian well (~10,000 $) + septic tank with leaching field (~25,000 $) | Around 35,000 $ to be expected in addition to the price of the land | Requires a mandatory soil study |
| Land price | ≈ 30,000 $ in remote rural areas to 200,000 $+ in popular suburbs | ||
💡 Are you looking for the ideal land for your prefabricated home? Fill out our form and quickly receive, free of charge, options that match your criteria.
Sources:
3. Surveying and layout plan

Once the land is purchased, the next step is to hire a land surveyor to make a certificate of implantation (or site plan). This official document specifies and marks the exact location where the house will be built, respecting property boundaries and regulatory margins.
In many municipalities, this plan is required to obtain the building permit, to verify compliance with zoning and local regulations. The surveyor then stakes out the land and prepares a plan indicating the orientation of the house, thus avoiding any accidental encroachment on neighboring lots.
Budget-wise, prices vary depending on the location, the complexity of the land and the firm chosen:
-
In an urban environment, a certificate of location alone revolves around 1 500 $.
-
A certificate of establishment with location for an isolated house was located around 1 760 $ a few years ago.
-
In 2025, the Price guide of the Order of Land Surveyors of Quebec suggests approximately 2 300 $ (plus taxes) for a complete site planning and surveying service for a single-family home. Prices generally range between 1,000 $ and 2,000 $, or even more depending on the case.
💡 Remember: the surveyor will also be able to produce a new location certificate Upon completion of the work, updating the condition of the lot with the house built. This document is often required for mortgage financing or when reselling.
Sources:
4. Permits and administrative fees
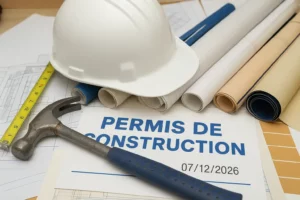
Before starting construction, it is mandatory to obtain a building permit with your municipality and pay the corresponding administrative fees. Each city has its own rules and fees. Generally, you must provide the house plans, the site plan prepared by the surveyor, and any other required documents, and then pay the fees before work begins.
The cost of the permit may be flat rate or calculated based on the value or area of the project. For example, in Montreal, the minimum fee for a residential permit was approximately 164 $ in 2020, or 9.80 $ per 1,000 $ of work, with a surrounding floor 868 $ per dwelling. Elsewhere, some municipalities set a flat rate (e.g.: 150 $ or 500 $) to which is added an amount per square meter or according to the value of the work. In practice, plan a few hundred dollars at least for this step.
In addition to the permit, other administrative costs must be included in your budget:
-
Notary fees and registration : when purchasing land, notary fees generally represent 1 % to 1.5 % of the sale price (taxes and disbursements included). In addition, there are transfer taxes (“welcome tax”) and other costs related to the acquisition. For example, for a plot of land costing 100,000 $, the total cost can reach 4,000 $ to 5,000 $Notary fees may also arise later, for example when setting up a mortgage to finance construction.
-
Hydro-Québec connection : if a power line already runs near your land, the connection costs are approximately 360 $ (extension to your entrance) more 85 $ for the initial installation. If no lines are nearby, additional poles may need to be installed (approximately 3,000 $ to 5,000 $ per post). A master electrician will also have to provide a 200 A electrical input and coordinate with Hydro-Québec, often in a global package (e.g.: 1 500 $ for connection and installation of the entrance mast).
-
Other file opening fees : depending on the project, this may include the request for connection to the water/sewer system (if the land is served), subdivision or cadastral registration fees, construction insurance (strongly recommended by the RBQ), or even the tax for a Architectural Implementation and Integration Plan (PIIA), if applicable.
| Type of fees | Description | Indicative cost |
|---|---|---|
| Building permit | Fixed rate or calculated according to value/surface area. Ex.: Montreal ≈ 868 $ minimum per dwelling | 150 $ to 1,000 $+ |
| Notary fees & transfer taxes | 1 to 1.5 % of the land price + “welcome tax” | Ex.: 4,000 $ to 5,000 $ for land at 100,000 $ |
| Hydro-Québec connection | Basic connection ≈ 360 $ + 85 $ installation; additional pole ≈ 3,000 to 5,000 $ | 360 $ to 5,000 $+ |
| Other costs | Water/sewer connection, construction insurance, subdivision fees, PIIA, etc. | Variable |
💡 In summary : between the permit, notary fees, connections to public services and various administrative costs, generally allow 2,000 $ to 5,000 $ (or even more depending on the complexity of the project). It is better to plan a slightly higher budget to avoid unpleasant surprises.
Sources:
6. Excavation and backfilling

Excavation marks the concrete beginning of construction on your land. It's a key step that prepares the location of the foundations and directly influences the strength and durability of the house. It includes several components:
-
Digging the excavations
Depending on the type of foundation planned (full basement, crawl space, or slab on grade), the required volume is excavated according to the engineer's plan. For a basement, the entire footprint of the house is generally excavated, 4-5 feet below the finished ground level (or deeper to reach the frost-free depth). A garage, if it does not have a basement, can be excavated less deeply. -
Excavation management
Excavation generates a significant volume of earth. Some of it is used for backfill around the foundations, but the excess must be removed by truck or moved elsewhere on the site. If the earth is unsuitable for backfill (clay, peat), it must be replaced with a compactable granular material. Transportation and disposal represent a cost to be expected. -
Drainage and drainage
Before pouring the foundations, we install the foundation drain (French drain) around the footings. This perforated pipe, protected by clean stone and geotextile membrane, evacuates the water towards a storm sewer, an absorption well or a natural slope. We also take advantage of this step to plan the location of a possible sump pump (collection well) if necessary. -
Trenches for services
We also dig the technical trenches:-
Septic tank and leaching field (unserviced land)
-
Water pipe from a well
-
Underground electrical connection
-
Connection to municipal water and sewer, if available
Planning for them from the excavation stage helps avoid costly rework later.
-
-
Backfilling
After the foundations have been poured and set, the surrounding area is backfilled with suitable material (gravel/clean stone near the drains, then compacted earth to the finished level). A gentle slope must be created to direct water away from the house. In winter, special measures (heating, temporary insulation) may be necessary to prevent freezing under the footings.
Costs
The price varies depending on the size of the house, the depth of the basement, the nature of the soil (rocky soil is more expensive to excavate), and the management of the spoil. from a few thousand to several tens of thousands of dollars depending on the scale of the project.
Sources:
7. Foundations
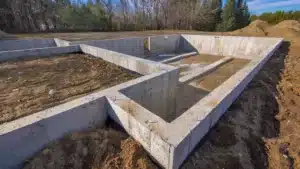
The foundation is the structural element that will support the entire weight of the house. It must be precisely designed and constructed, taking into account the soil type and climate (particularly the frost-free depth in Quebec).
For a prefabricated house, as for any construction, two main families of foundations exist:
-
Reinforced concrete (with basement, crawl space or slab on ground)
-
Pious (screwed metal or concrete piles)
The choice will depend on your project, the characteristics of the land and the recommendations of the structural engineer.
1. Reinforced concrete foundations (most common case in self-construction)
- Formwork and casting
After excavation, formwork is installed for the footings and foundation walls. For a basement, the footings are poured first, then the formwork is erected and the concrete for the walls is poured (typical thickness: 8 to 10 inches). Anchors (rebar or J-bolts) are integrated to secure the frame or prefabricated modules. - Waterproofing and insulation
Once the formwork is removed, a waterproof coating (tar or membrane) is applied to the exterior surface. Rigid insulation panels are often added to improve energy efficiency, especially if the basement will be heated. For a monolithic slab, insulation is placed under the slab to prevent freezing. - Basement slab
The concrete floor rests on a layer of compacted gravel, a vapor barrier, and the pre-integration of rough plumbing (drains, wastewater). The slab is generally 3 to 4 inches thick and is finished with a power trowel. - Season and deadlines
Pouring is preferred outside of periods of intense frost. In winter, the concrete must be heated and protected. The ideal cure time is 28 days before loading the foundation, although work can continue cautiously after a few days.
2. Pile foundations
Galvanized metal or concrete piles are driven or screwed into the ground until they reach a load-bearing surface. This method is common for:
-
Small houses and chalets
-
Extensions
-
Constructions on unstable soils or exposed rock
-
Projects where you want to avoid digging a basement
In the prefabricated context, some manufacturers offer models on piles or crawl spaces, especially for chalets or second homes.
3. Indicative cost
The cost of foundations varies depending on the perimeter, area, and type chosen. For concrete walls, generally plan on between 20,000 $ and 40,000 $ (indicative amount, may fluctuate depending on the project). The screw piles may be slightly cheaper in materials, but require a suitable floor structure, which can reduce the price gap.
Consider including in this position:
-
Renting a concrete pump (if the truck cannot access the site directly)
-
THE steel reinforcements
-
There skilled labor
Sources:
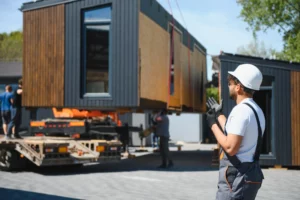
8. Delivery and assembly of the prefab

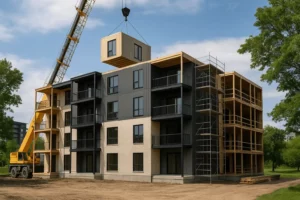
Once the foundation is ready, your prefabricated home can be delivered to the construction site. The modules arrive on specialized trucks, usually in several sections (for example, two halves for a single-story home or several modules for a two-story home). Delivery is planned in advance and synchronized with the availability of a crane and the assembly team. The crane unloads the modules and places them directly on the foundation, where they are secured and assembled.
In most cases, the builder coordinates delivery, crane rental, and installation, so you don't have to manage these technical steps. The modules are designed to fit together with millimeter precision, allowing the house to be "watertight and airtight" in a single day—a considerable time saving compared to traditional construction.
Once the modules are in place, the team completes the junctions between the walls, floors, and roof, installs the elements that could not be transported already fixed (e.g., stairwell, certain roof sections), then finalizes the plumbing and electrical connections. The interior and exterior finishes are then completed within a few weeks.
Good to know : The foundation must be ready and compliant before delivery. It is strongly recommended to have the dimensions and level checked by a professional before the scheduled date, to avoid any unpleasant surprises.
At the house of Real Estate Collection, we help you find the right suppliers and manufacturers in order to optimize your budget and avoid unnecessary expenses.
From site preparation to coordination with the builder, we support you every step of the way to ensure the delivery and installation of your prefabricated home is efficient, stress-free, and cost-effective.

📌 Ready to take the next step?
Find out how we can help you make your prefabricated self-build project a reality now!
9. Connection to services

Once the house is installed, it must be connected to the various essential services (water, sewer, electricity, etc.). This step varies depending on whether the land is serviced or not.
Land with municipal services
The house must be connected to the municipal water supply for drinking water and to the sewer system for wastewater disposal. This work, which must comply with current standards, is generally carried out by a certified plumber or civil contractor.
In concrete terms, the municipal water line is extended to the house's water inlet, with the installation of a meter if required, while the sewer outlet (in the basement or crawl space) is connected to the municipal sanitary network. In some municipalities, connection fees—sometimes flat rates—apply for new construction.
At the same time, the electrical connection is made: the electricity supplier connects the electrical input of the main panel to the network, via overhead line or underground cable depending on the configuration. If a natural gas network is available, the connection is made at this stage to supply a heating system, a water heater, or a stove.
Land without services
On a unserviced land, the planned autonomous installations must be put into service.
-
Drinking water : The artesian well, previously drilled, is equipped with a submersible pump connected to the house by a pipe and an electric cable. A pressure tank inside ensures water distribution. The water heater (electric, gas, or heat pump) is then installed to provide hot water.
-
Wastewater : The septic tank and leach field are connected to the plumbing. The main drain pipe (often 4 inches) exits to the tank, with a vent on the roof for ventilation. These installations must comply with environmental regulation Q-2, r.22 in Quebec and may require an inspection. The type of final treatment (conventional field or advanced secondary system) depends on the results of the soil study.
-
Electricity and other services : Connection is made to the public network if possible. In remote areas, a solar system or another energy source can be considered, although this is less common. Depending on needs, it is also possible to install an antenna for rural Internet or connect to a cable network.
Responsibilities and budget
In most cases, the connection work are not included in the base price of a prefabricated house. These are the responsibility of the owner or specialized contractors. Therefore, coordination with a master electrician for the final connection of the electrical panel, as well as with a plumber to connect the water inlet and the sewer outlet (or the well and septic tank on an independent site) must be planned.
Costs can vary considerably:
-
Serviced land : a few thousand dollars is usually enough, because the connections are short and simple.
-
Unserviced land : drilling a well (around 10,000 $) and installing a septic system (around 25,000 $) represent major investments to be included in the overall budget.
These private infrastructure spending are often underestimated by self-builders, but they can have a significant impact on the final cost of the project.
Advice
Before covering or putting the installations into service, have them inspected: quality and flow test of the well, verification of the watertightness of the sewer connections, municipal approval of the connections... All these checks will avoid costly corrections later.
Connection to services for a prefabricated house in Quebec
Comparison of work and costs to connect a prefabricated house depending on whether the land is served or not.
| Type of land | Connection work | Indicative costs | Constraints / Notes | Checks to be made |
|---|---|---|---|---|
| Served (municipal water and sewers) | Extend the water and sewer lines to the house; electrical connection (above ground or underground); water meter if required; natural gas connection if available. | Generally a few thousand dollars (municipal connection fees + electrician). Hydro connection: ~360 $ + 85 $ installation; additional pole: ~3,000–5 $. |
Simpler and faster work; coordination with RBQ licensed plumber/electrician. | Municipal approval of connections; compliance with local standards; adequate drainage slope. |
| Not served (autonomous) | Drilling of an artesian well + pump & tank; septic tank + purification field; electrical connection (public network or autonomous solution). | Well ~10,000 $ (depending on soil/depth). Septic system ~25,000 $. Installation costs and inspections to be expected. |
Mandatory soil study; comply with regulation Q-2, r.22; possible inspection; longer lead times and logistics. | Well potability and flow rate test; leak-tightness check of connections; municipal/ENV approval if applicable. |
To remember: These services are rarely included in the base price of a manufactured home. Plan to coordinate with a master electrician and plumber, and add a contingency budget.
Sources:
10. Electricity and plumbing in a prefabricated house
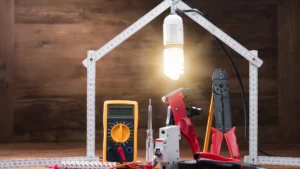
After assembling a prefabricated house, it remains to finalize electricity and the interior plumbingThe extent of this work depends heavily on the type of prefabrication chosen: modular, in panels Or in kit form.
Electricity
-
Modular house : The main electrical panel (often 200 A) and some of the wiring are installed at the factory. On site, the electrician only has to connect the electrical input, link the circuits between the modules and connect the remaining outlets, switches, lights and appliances.
-
Panel or kit house : No wires are pre-installed. The electrician must run all the circuits, install the panel, run the cables through the walls and ceilings, install electrical boxes, outlets, and switches, and then connect everything to the network, just like a traditional house.
Plumbing
-
Modular house : Most pipes (PEX or copper) and some plumbing fixtures can be factory-installed. On site, the plumber connects the segments between modules, connects to the water sources and sewer system, and then installs water heaters, toilets, sinks, showers, or bathtubs if necessary.
-
Panel or kit house : All installation is done after the structure is assembled. The plumber installs all pipes, fixtures, and connections. Materials may be provided in a kit, but installation is done on-site.
Regulation (RBQ)
In Quebec, only licensed professionals can carry out this work.
-
An individual cannot install the entire electrical or sanitary system himself, unless he has an appropriate RBQ license.
-
The final connection, main installations and finishing must be entrusted to a master electrician and to a qualified plumber.
Practical tip
Before closing the walls, take the opportunity to integrate:
-
Central vacuum ducts
-
Home automation or computer network cabling
-
Sockets for charging station or integrated audio system
These additions are simpler and more economical to plan before interior finishing.
Estimated costs (standard new house)
-
Electricity : 8,000 $ to 15,000 $
-
Plumbing : 10,000 $ to 15,000 $
Prices vary depending on the square footage, number of bathrooms, degree of prefabrication, and region. Always ask. several quotes to compare.
Sources:
11. Basement (often raw at the start)
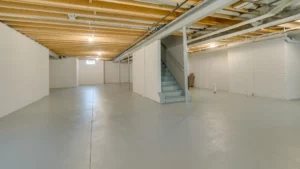
In new construction, and particularly in the case of a prefabricated house, it is common for the basement to be delivered in its raw state. In concrete terms, this means that you will find the foundations and the concrete slab exposed, with possibly support posts, load-bearing walls or beams already in place, but without interior partitions, wall coverings or floors.
Many buyers choose this option to reduce the initial cost and postpone the renovation until later, when the budget allows. Some manufacturers still include certain basic elements, such as the stairs leading to the basement and its drywall partitions. The rest of the renovation, however, remains at the discretion of the owner.
Finishing a basement typically involves building partition walls to create the rooms, adding insulation and vapor barriers to the walls, installing drywall, sealing joints, and painting, then installing the flooring, doors, moldings, and electrical outlets. If you're planning to add a bathroom or laundry room, it's essential to plan for plumbing connections. Plumbing outlets must be installed before pouring the slab, otherwise you'll have to break up the concrete to add them, which complicates and increases the cost of the work.
Budget-wise, a complete basement renovation can easily cost between 20,000 $ and 40,000 $, depending on the materials chosen and the number of rooms to be created. Thus, a house advertised at 250,000 $ "excluding the basement" could cost much more once it is fully finished.
In short, opting for a raw basement allows you to stay within your budget in the short term, but involves planning for additional work and expenses in the medium to long term. Some homeowners choose to finish only a portion, such as a family room, and leave the rest as raw storage. Whatever your approach, be sure to comply with current standards, including ceiling height, egress windows in bedrooms, and adequate ventilation.
12. Interior finishes

Once the structure is assembled and the main systems installed, it remains to carry out the interior finishes to make the house habitable and aesthetically complete.
In a prefabricated house, some finishing touches may already be well advanced in the factory (for example, drywall partitions installed and sometimes painted). However, the junctions between modules and various details are completed on site.
1. Sealing and painting
-
Junctions : Gypsum joints between modules are completed on site with strips, joint compound and sanding.
-
Paint : The factory often applies a primer, but the final painting is done after the joints have been drawn.
-
Verification : Some manufacturers do not include these works (e.g. St-Jacques excludes them from the base price). Be sure to check your inclusions/exclusions.
2. Woodwork and moldings
-
Items concerned : Door and window frames, baseboards, cornices, stairs (ramp or half-wall), cladding around fireplaces.
-
Delivery and installation : Many manufacturers include interior doors and moldings as part of the base price. Final installation is often done after painting.
3. Bathrooms and storage
-
Laying of the vanities, mirrors, accessories (towel racks, etc.).
-
Development of wardrobes (rods, shelves) and storage cabinets.
-
Completion of small rooms such as the ground floor bathrooms.
4. Floor coverings
-
The floor coverings are installed After paint and moldings, to avoid any deterioration (see step 14 of the overall process).
5. Self-construction and possible savings
-
The finishing touches are often the most accessible part for a self-builder: painting, installing skirting boards, installing accessories.
-
Attention : Certain tasks, such as jointing, require expertise for an impeccable result.
6. Key points to remember
-
Clarify what is included in your contract with the manufacturer.
-
At the house of Master Builder St-Jacques, some finishes are included (kitchen, bathroom, base moldings), but joints, paint and floors are excluded.
-
Some manufacturers offer “ready-to-finish” packages where all interior finishing is left to the customer to reduce costs.
Sources:
13. Kitchen and bathrooms
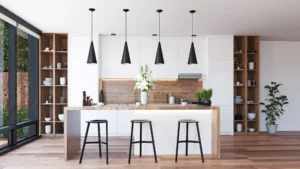
These parts are treated separately, because they group together plumbing, cabinetmaking, household appliances, ceramics, etc.
In prefabricated houses, they are often partially factory installed, but remain largely customizable.
1. Plumbing and sanitary appliances
-
Included as standard : toilet, bath, shower, sinks.
-
Possible extras : freestanding bathtub, custom ceramic shower, heated floor.
-
To remember : the more premium the choice, the more additional costs there will be.
2. Cabinets and counters
-
Budget allocation : a fixed amount (e.g. 12,000 $) is provided for kitchen/bathroom cabinets.
➜ You choose from the partner supplier; any excess is at your expense. -
Facility : some cabinets are installed in the factory, others after assembly on site.
-
Counters : standard laminate, extras for quartz/granite, installed by a specialist.
3. Finishes and coatings
-
Ceramic : standard acrylic shower included; fully tiled shower or ceramic backsplash = extra.
-
Heated floors : option to be planned from the start (wires installed before mortar).
4. Household appliances
-
Not included : stove, fridge, dishwasher, washer, dryer.
-
Sometimes included : kitchen hood (e.g. at MCSJ, hood ≥ 375 CFM compliant with the Code).
-
Facility : electrician and plumber make the connections; purchase and delivery at your expense.
5. Budget and customization
-
Standard choice : melamine cabinets, laminate countertop, basic ceramic → respecting the budget.
-
Premium Choice : stone countertops, custom cabinets, designer plumbing → higher budget.
-
Trick : focus your investments on the pieces that matter most to you.
6. Checks before the end of the work
-
Test all plumbing: leaks, drains.
-
Check the electrical circuits of household appliances.
-
Make sure all adjustments are made (cabinet doors, ceramic joints, etc.).
📌 In summary :
Kitchens and bathrooms offer a lot of potential for customization... and therefore budget variation. Clarify your allocation, inclusions, and choices from the start to avoid surprises.
Sources:
14. Floor coverings (floors)
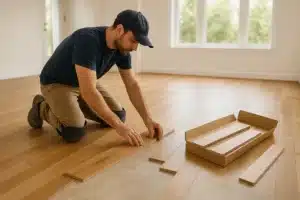
Interior flooring (other than the concrete basement slab) typically includes hardwood, laminate flooring, ceramic, vinyl, or carpet, depending on the room and taste. In many manufactured home projects, these are not included in the base price and are the responsibility of the customer unless otherwise stated. This is a common practice: the house is delivered ready for flooring, but without the supply or installation. This allows customers to choose their materials and avoids the risk of damage during shipping or assembly.
After painting and before moving in, you will need to lay your floors: hardwood or floating in the bedrooms and living room, ceramic in the entrance, kitchen and bathrooms, etc. This work can be entrusted to the builder or a contractor, or done yourself: floating is accessible to DIY enthusiasts, hardwood requires more tools, and ceramic a minimum of expertise.
Carefully check the contract exclusions: at St-Jacques, for example, floor coverings are excluded but available as a subcontractor. However, some builders include a base covering (vinyl linoleum) in certain rooms.
Estimated budget :
-
Hardwood: 5 to 10 $/ft² (material)
-
Ceramic: similar with installation
-
Floating floor: 2 to 4 $/ft² + underlay
For a 1,500 sq ft house excluding the basement, we are easily talking about 10,000 $ to 20,000 $ depending on the quality and the surface area to be covered.
During installation, the substrate must be clean, dry, and level. Screw the subfloor to prevent squeaking and follow the manufacturer's instructions (wood acclimatization, adhesive suitable for vinyl, decoupling membrane for ceramic, etc.). Finish by installing quarter-rounds or thresholds for a flawless finish and well-hidden expansion joints.
Sources:
15. Exterior fittings
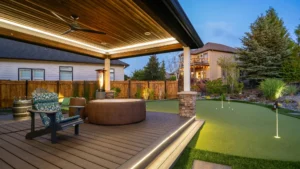
Landscaping encompasses everything around the house that is not directly the main building, but that contributes to the functionality and aesthetics of your property.
Often these works are carried out at the all end of the project (or even after taking possession, if necessary), because the site needs to be free for construction. Among the main external elements to be planned:
-
Balconies, terraces and exterior stairs : Your manufactured home will have exterior doors (front door, patio door, etc.) often located at a certain height above the finished ground. Therefore, steps or a stoop must be built to access each door. For example, a front staircase with a small porch, or a large patio/deck in the back. Some choose treated wood, composite, precast or poured concrete, etc. This item can be modest (a few precast concrete steps) or substantial (a full 12'x14' wooden deck with railing and roof). Ensure that these structures comply with the Code (railing required if more than 60 cm high, etc.). Often, self-builders build their own patio after construction to save money.
-
Final exterior cladding and gutters : If the exterior cladding of the house (brick, vinyl, fiber cement, etc.) has not been fully finished in the factory, it will be completed on site during the exterior finishing. In many modular cases, the exterior panels are already in place on each module except at the joints – the team then comes to install the finishing strips at the corners, caulking, etc. It is also necessary to install the gutters along the roof to channel rainwater. Gutters are usually installed by a specialist once all the siding is finished. This is important to protect your foundation (water must be directed away from the house, ideally towards a permeable surface or a barrel, etc.). The cost of installing aluminum gutters is modest (typically a few hundred dollars, depending on the length) and it contributes greatly to the durability of the house.
-
Parking entrance : Your temporary access path must be transformed into a real driveway and parking lot. You can choose to simply add gravel compacted for a stone parking lot, or invest in a more permanent coating:asphalt (cost approximately 3 to 10 $ per sq. ft. depending on thickness), or self-locking paving stones (more expensive, 10 $+ per sq. ft.), or concrete. Often, you wait a few months for the ground to stabilize before laying asphalt. The choice depends on your budget and preferences. Also consider the location and shape (wide enough for two cars, need for a turning lane, etc.).
-
Turfing and landscaping : Once construction is complete, the land will have suffered (compacted soil, displaced earth). The final shaping of the land must be redone. Spread the topsoil (the one stripped at the beginning, or black earth brought back) over the desired areas then proceed to grass. Two methods: seeding (cheaper but slower, preferably spring or autumn) or laying peat slabs for an instant result (more expensive, ~1.50 $ per sq ft installed). Remember to level well, keeping a slight positive slope away from the house. You can also plant shrubs, flowers, hedges according to your tastes. Landscaping can be minimal the first year (just grass to control erosion) and improved over time to spread the costs.
-
Various exterior fittings : Think about details such as: the mailbox, the street lamp or the exterior lights (often included – e.g.: St-Jacques includes the exterior lights shown on the 3D plan, the visible civic address, possibly the fence if you want one (not mandatory, to be seen according to your needs, costs extra). If you are in a rural area, a shelter for the well and the filtration system may be necessary (or an accessible inspection chamber). Also plan the arrangement of the coping stones for your basement windows (and install the coping stone covers if required, to prevent water/snow accumulation).
All this constitutes the finishing touch of your self-construction. These external posts are often excluded from manufactured home contracts also (the manufacturer does not include the deck, lawn, etc., except perhaps a sketch of a temporary staircase). It is therefore up to you to budget for them and carry them out. The advantage is that you can do it gradually. For example, the first year, you could limit yourself to making the land safe and usable (stairs at the doors, gravel, lawn) and then add the terrace of your dreams a little later.
From a financial point of view, outdoor landscaping can easily represent 5 % to 10 % of your project's total budget if you include a little bit of everything (patio, asphalt driveway, complete landscaping). This isn't insignificant, but it's often the part that significantly improves the enjoyment of your property. Don't forget it in your cost and time forecasts.
Sources:
16. Extras and unforeseen events

Despite planning, every self-build project has its share unforeseen events. It is therefore essential to allow room in your budget and schedule to deal with this.
It is generally recommended to book around 10 % to 15 % of the total budget for unforeseen expenses or last-minute additions.
This can cover, for example, a sudden increase in the price of materials, additional delays, or unplanned work.
Among the extras common features that a self-builder may decide to add along the way (if the budget allows or if a need arises):
-
Fireplace or stove : Adding a gas fireplace, wood fireplace, or wood stove is a popular extra for character and comfort. Although not initially planned, its installation requires a chimney flue, fire clearance, and sometimes an additional foundation under the fireplace (if it is very heavy). It is entirely possible to add it, but plan for the costs (several thousand dollars easily for the appliance and installation). It is better to think about it in advance to integrate the chimney into the construction, otherwise you will have to drill holes afterward.
-
Bathroom in the basement : As discussed in step 11, it is perfectly possible to move in without finishing the basement. However, some people still choose toinstall at least one partial bathroom in the basement from the initial construction. For example, a functional toilet and sink, even if you have to finish the shower later. This extra can be decided during construction (if you see that the budget allows it, you ask the plumber to install everything in the end). Just make sure that the drains and inlets were planned (otherwise, it's no longer an extra but a big change!).
-
Sump pump, water softener, etc. : Depending on the terrain conditions, you might find that you need a bilge pump (sump pump) in the basement to evacuate water from the French drain if gravity is insufficient. Or, on an artesian well, the water may be very ferrous or hard – you may want to install a water softener or a filtration/UV system to make it drinkable. These are additional pieces of equipment that must be purchased and installed, often after the fact when the need is identified. Allow for these eventualities (a water treatment system can cost 1,000 to 3,000 $ depending on the complexity).
-
Last minute changes : When building a self-build project, you may decide to change a material along the way (for example, choosing better flooring, adding additional recessed lights, etc.). Each minor change can cost a few hundred dollars more. This isn't strictly an unforeseen event (more of a voluntary adjustment), but it eats into the budget if you're not careful. Try to limit changes during construction, as this can lead to delays and additional costs.
In summary, anticipate the unexpected. : the weather can cause delays (a week of rain can delay the roof, for example), the ground can hold surprises (unexpected hard rock to be blasted, softer ground requiring reinforcement, etc.), the materials can have defects or be delivered late. All of this can lead to additional expenses (extended tool rental, purchase of replacement materials, additional labor). It is therefore vital to have a financial cushion. Many experts advise always keep a reserve for unforeseen events and overruns. Similarly, in terms of stress, it's reassuring to know that we have room to maneuver.
In self-construction, good detailed planning Reduces the number of unforeseen events, but never completely eliminates risk. Prepare yourself to make daily decisions and solve small problems quickly. If you have planned each step well (as this comprehensive plan suggests), you will have a clear overview and will be able to better absorb the project's uncertainties. And in the end, the reward will be a house that you built yourself, knowing every step of the process.
Sources:
Conclusion
This complete self-build plan for a prefabricated house in Quebec covers the essential steps to take, from initial financial preparation to final finishing touches.
As each project is unique, certain steps may vary or be added (for example, the plan design stage, obtaining a GCR guarantee if you are dealing with a contractor, etc., have not been detailed here but should be considered).
The important thing is to respect the logical order, to check compliance at each phase, and to surround yourself with certified professionals for critical tasks.
With time, diligence, and a healthy dose of passion, your self-build project will become a reality. Happy building!
Sources:
The above information and estimates have been compiled from various specialized resources and practical self-construction guides in Quebec, including advice from Desjardins, of National Bank, the APCHQ/Desjardins self-construction guide, as well as information from prefabricated home builder websites (e.g.: Pro-Fab, The Master Builder St-Jacques) and submission platforms for residential works such as Soumissionsterrain.ca.
These sources confirm best practices, approximate costs, and points of vigilance at each stage, specific to the Quebec context. We did not encounter any major conflicting information during our research; however, it is always recommended to validate the precise details of your project with local professionals (municipality, surveyor, engineer, etc.), as standards and prices can change depending on location and time. If you have any doubts or need support, do not hesitate to consult experts to secure your self-build project.
Compare. Simplify. Save.
Go from idea to reality with Real Estate Collection.
Fill our form, in just a few seconds.